centos之tigervnc部署
TigerVNC Server是一款高性能的VNC(Virtual Network Computing,虚拟网络计算)服务器软件,它是基于开源的TightVNC项目发展而来,旨在提供一个安全、效且兼容多种平台的远程桌面解决方案。
VNC允许用户通过网络连接到另一台计算机的桌面,就像坐在那台计算机前面一样操作它。
env
- centos6.5
#tightvnc
1.装VNC服务端
# rpm
rpm -ivh tigervnc-server-1.1.0-16.el6.x86_64.rpm   //rpm -ivh  vnc-server
如果rpm安装时发现有依赖,建议直接使用yum安装,轻松解决依赖问题:
# yum
yum install tigervnc-server  -y

# desktop(如果没有安装则需要服务器安装图形化)
yum grouplist
yum groupinstall -y "X Window System" "Desktop"
2.编辑vnc配置文件
/etc/sysconfig/vncservers

#添加以下内容:
VNCSERVERS="1:root"          //定义默认登录用户
VNCSERVERARGS[1]="-geometry 800x600 -alwaysshared -depth 24"     //设定远程登录的分辨率
注:分辨率可以根据实际情况调整,分辨率不合适可能导致vnc连接显示黑屏的现象。
3.设定VNC的密码
vncserver 第一次输入提示需要设定VNC的密码:

[root@JY-DB ~]# vncserver
You will require a password to access your desktops.
Password:
Verify:
xauth:  creating new authority file /root/.Xauthority
New 'JY-DB:1 (root)' desktop is JY-DB:1
Creating default startup script /root/.vnc/xstartup
Starting applications specified in /root/.vnc/xstartup
Log file is /root/.vnc/JY-DB:1.log

[root@JY-DB ~]#
若想修改vnc用户密码,可使用vncpasswd命令修改
[root@JY-DB ~]# vncpasswd
Password:
Verify:
4.查看vnc的会话信息
# 重启vncserver服务:
/etc/init.d/vncserver restart

# 查看vnc的会话信息:
vncserver -list
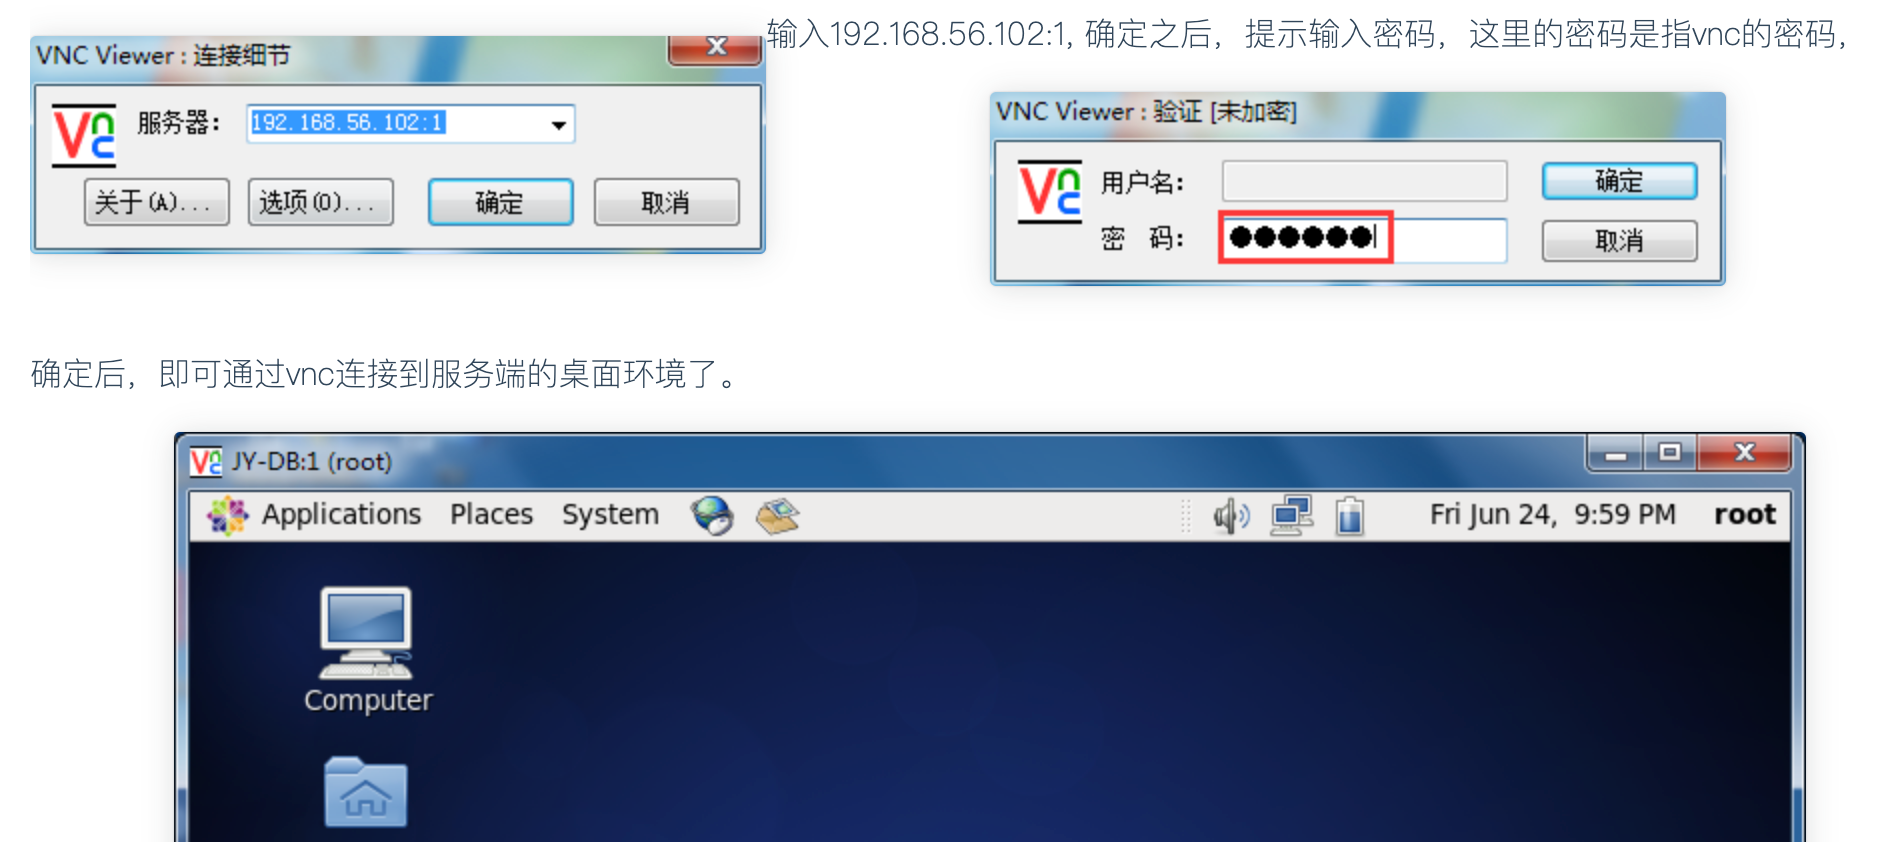
5.客户端测试vnc连接
客户端是vncviewer,输入连接信息:192.168.56.102:1
vnc-viewer界面